If you like this page please consider sharing it with your friends!
Content
Introduction
Step 1: Create your landing page
Step 2: Create your email marketing automation and connect it to the landing page
Step 3: Send traffic to the landing page with Google Ads
Introduction
A sales funnel is a set of automated actions, designed to process your sales, from the first impression stage, through lead generating, trust building, action and conversion (the point where a lead is turning into a buying client)
Glossary:
Funnels – A set of orchestrated actions, made by automated online tools, driving sales
Leads – a person who shows interest in your products/services
Customer – a lead who contributed to your goal
Conversion – the process of what the customer did to reach your goal
For this documentation, we will be focusing on Lead generation where we try to gather interested users for Omni Online Strategies (This is only a sample scenario). To make this possible, we will be using Google Ads Platform as well as SendInBlue. SendInBlue will be used for putting the leads into a sample workflow. We will also be creating a sample landing page in SendInBlue that’ll be used for redirecting the users when they clicked on the ad we’ll be making using Google Ads. Winning Marketing Funnels with Google Ads and Email Marketing!
Be sure to create your landing page first before setting up a campaign in Google Ads. For this documentation, we will be using SendInBlue for making the landing page. If you want to check out other options to create landing pages, visit this article. It is important to take note that we can use any services to make the landing page. The most important element when creating a landing page is having a form. This form will be used for collecting the lead’s email address. We’re only using SendInBlue since it automatically adds the lead’s email address into a contact list once they’ve used the form on the landing page.
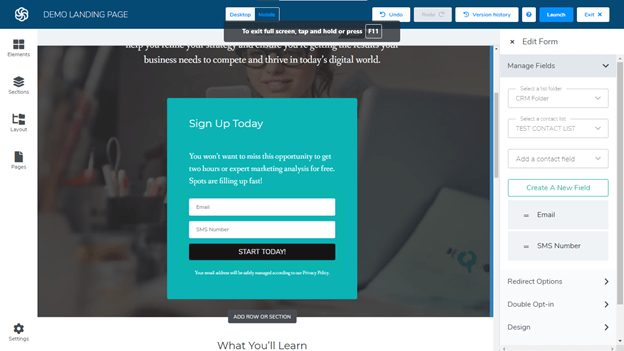
On your landing page editor, make sure you’ve selected what list will be used for adding the lead in once they’ve used your form. Below is a screenshot of SIB Landing Page editor.
Based on the screenshot above, the email address and SMS number of the lead will be added to “TEST CONTACT LIST” in “CRM Folder” after they’ve used the form.
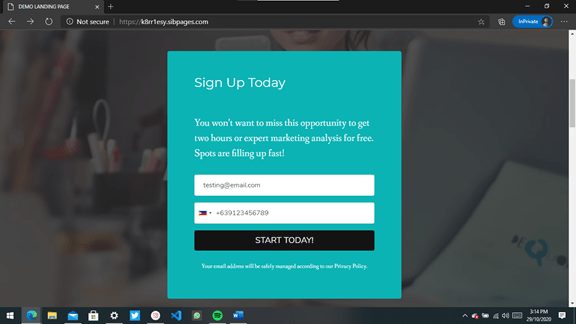
Publish the landing page and copy the URL of the landing page (You can also have it embedded into your website if you don’t want your upcoming leads to see the URL).
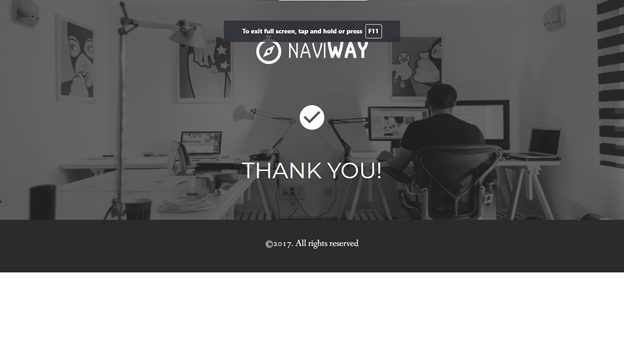
Above is the landing page we just published! From here your leads will enter their email address and SMS number (You can also have that change in SIB’s landing page editor). Once the lead pressed on “Start Today!”, they’ll be redirected to this page.
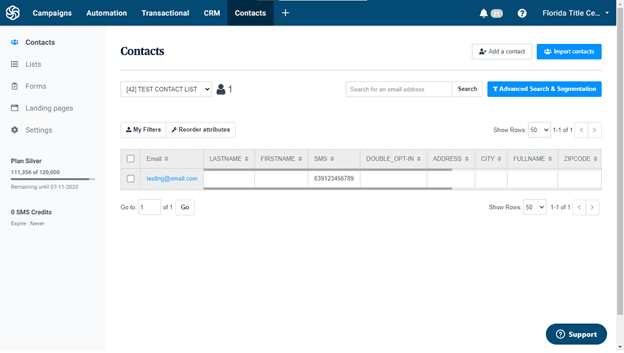
After that, the lead’s contact details will be automatically added to the contact list we created in SendInBlue.
Once you have published your landing page and have made sure that it’s working correctly, it’s time to connect it to your Google Ads Campaign.
One way to reach customer engagement is by sending them emails welcoming them to your site. Your email could be a discount code once they used the landing page form or it could be a well-informed description of your site. Now, we do not want that to send manually since it takes a lot of resources. With SendInBlue, we can automate the sending of these emails with the use of their email automation workflow, and implementing them only takes a few minutes.
To start, create a new workflow
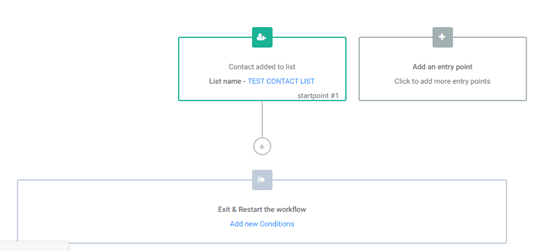
Set your entry point as “A contact is added to a list”
Select the list we’ve made that is used by the form
Your automation should now look like this
(Sponsored)
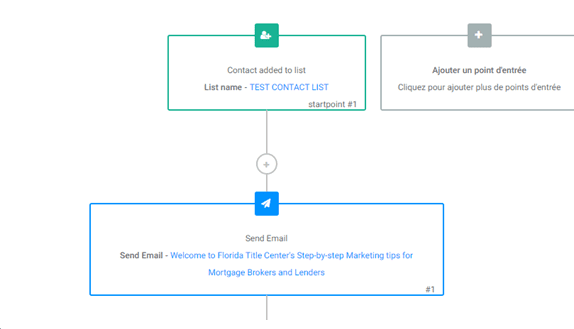
5. Add an action and then select “Send Email”
6. Your workflow should now look like this
Based on the screenshot above, we can say that when a new contact is added, the workflow will do the following actions above. You can, of course, add multiple actions like sending scheduled multiple emails and more.
Step 3: Send traffic to your landing page with Google Ads
Now, all it is left is connect the landing page to your Google Ad Campaign. Our objective for this chapter is to have the user redirected to the landing page once they have clicked the ad we’ll be making.
Note: For this documentation, we will be solely focusing on implementing the landing page into a Google Ads campaign. We recommend to embed this landing page into your website and/or host it directly to your server since SendInBlue’s Landing page generates the domain, randomly.
Create a new campaign
On campaign type, select Search
On goals, select Leads
Select website visit as the way to reach your goal
Paste the SendInBlue landing page here
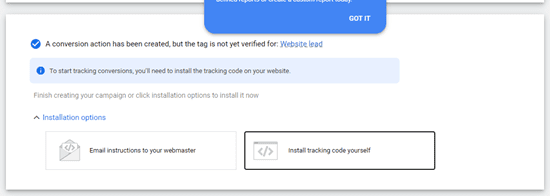
You’ll be asked to paste a tracking code into your landing page to track conversion rates. Be sure to select the “Install Tracking code yourself” option
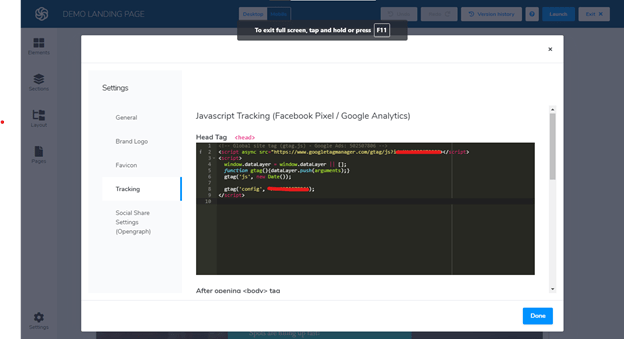
7. Paste the tracking code into your landing page. This needs to be pasted in the <head> tag on your page. SendInBlue’s landing page editor makes the implementation easier by just opening the settings window. (Some parts were blocked for security reasons).
8. Be sure to publish the landing page again so that Google Ads can detect the tracking code.
9. Press Save and Continue to go to the next step
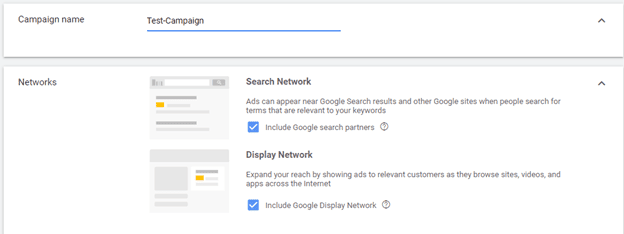
10. Name your campaign and make sure the two networks are checked. This will expand the availability of your ads.
(Sponsored)
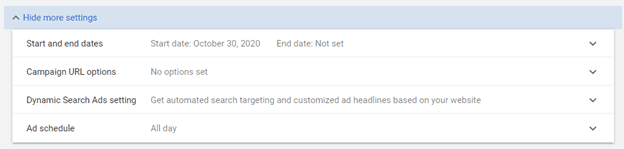
11. Pressing “Show more settings” will display the following options. However, we’ll leave the following in default for now.
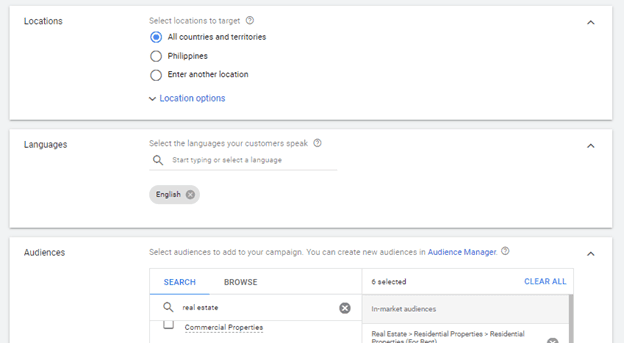
12. In Targeting and audiences, we’ll be able to limit the ad to specific audiences. This could be a place, a person’s language, etc.
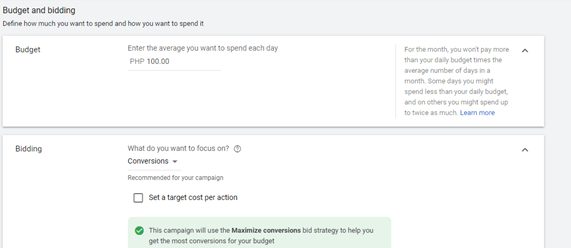
13. On Budget and Bidding, you’re required to enter how much you’re willing to spend for your ad on Budget. For Bidding, you’ll be asked if where do you want to focus on the campaign (eg: Conversions, Clicks, etc). For this documentation, we will be using the following options:
Since Google recommends to stick to Conversion as the bidding, we’ll use it.
14. Below are the other available options for Budget and Bidding. However, we’ll be using the default settings for this documentation
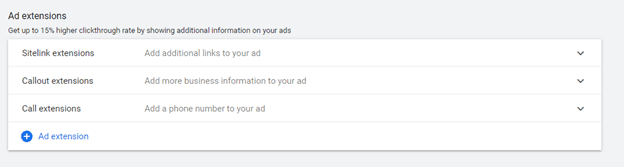
15. Ad extensions are used to add more information to your ad. Here, you can add the phone numbers, information, and site links to your company.
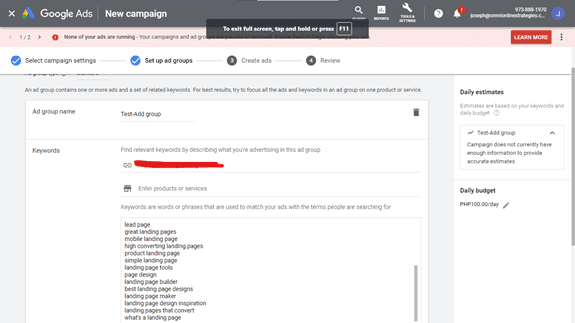
16. Ad groups are used to detect ads based on keywords. Here you can add/edit keywords. Reminder, we’re only using the landing page URL as a demo. It is recommended to embed this landing page into your website so that your leads can visit other pages of your site.
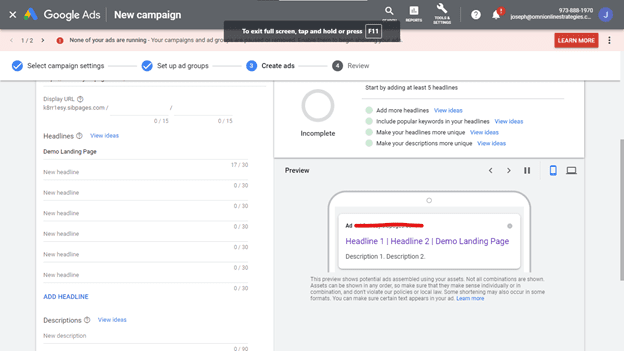
17. In create ads, it’ll display a preview of your upcoming ad and from there, you may modify and/or add new headlines as well as a description of your ad.
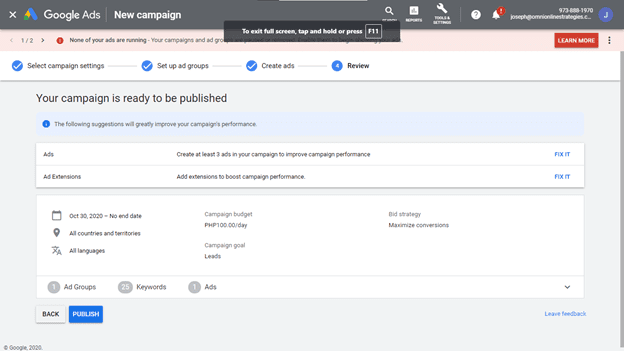
18. Lastly, it will display a summary of the overall campaign like this. It’ll display information like the start date of the ads, your budget per day, and your campaign goal.
19. Once published, your ad will look like this in the search results.
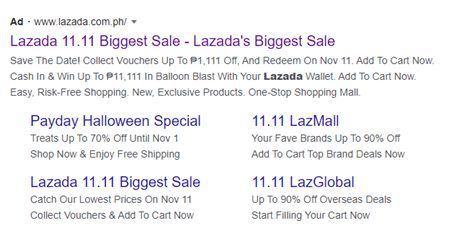
Some ads are also complex that can display more links and descriptions. Below is a sample of that ad about an online shopping site popular in South East Asia
Based on the screenshot above, ads can have multiple links as well as headlines and descriptions. This is possible by adding multiple headlines and descriptions, as well as ad extensions.
Summary
We were able to create a landing page in SendInBlue that includes a form.
The form adds the email address and SMS number of the contact in a list.
We were able to create an Ad Campaign that redirects the user to the landing page we’ve made
Google Ads also track the conversion rate of the page with its tracking code. Ads are also expanded to Search and Display Network for expanded availability.
After doing the following actions, theoretically, the following scenario will happen:
The user searched in Google that’s related to the ad.
The ad will be displayed.
The user will be redirected to the Landing Page.
The user will enter its email and SMS number.
Users turn into a lead, they’ve been added to a SendInBlue list.
SendInBlue workflow detected that a new contact has been added to the list, it’ll then start doing its own set of actions.
We use cookies on our website to give you the most relevant experience by remembering your preferences and repeat visits. By clicking “Accept”, you consent to the use of ALL the cookies.
This website uses cookies to improve your experience while you navigate through the website. Out of these, the cookies that are categorized as necessary are stored on your browser as they are essential for the working of basic functionalities of the website. We also use third-party cookies that help us analyze and understand how you use this website. These cookies will be stored in your browser only with your consent. You also have the option to opt-out of these cookies. But opting out of some of these cookies may affect your browsing experience.
Necessary cookies are absolutely essential for the website to function properly. These cookies ensure basic functionalities and security features of the website, anonymously.
Cookie
Duration
Description
cookielawinfo-checkbox-analytics
11 months
This cookie is set by GDPR Cookie Consent plugin. The cookie is used to store the user consent for the cookies in the category "Analytics".
cookielawinfo-checkbox-functional
11 months
The cookie is set by GDPR cookie consent to record the user consent for the cookies in the category "Functional".
cookielawinfo-checkbox-necessary
11 months
This cookie is set by GDPR Cookie Consent plugin. The cookies is used to store the user consent for the cookies in the category "Necessary".
cookielawinfo-checkbox-others
11 months
This cookie is set by GDPR Cookie Consent plugin. The cookie is used to store the user consent for the cookies in the category "Other.
cookielawinfo-checkbox-performance
11 months
This cookie is set by GDPR Cookie Consent plugin. The cookie is used to store the user consent for the cookies in the category "Performance".
viewed_cookie_policy
11 months
The cookie is set by the GDPR Cookie Consent plugin and is used to store whether or not user has consented to the use of cookies. It does not store any personal data.
Functional cookies help to perform certain functionalities like sharing the content of the website on social media platforms, collect feedbacks, and other third-party features.
Performance cookies are used to understand and analyze the key performance indexes of the website which helps in delivering a better user experience for the visitors.
Analytical cookies are used to understand how visitors interact with the website. These cookies help provide information on metrics the number of visitors, bounce rate, traffic source, etc.
Advertisement cookies are used to provide visitors with relevant ads and marketing campaigns. These cookies track visitors across websites and collect information to provide customized ads.